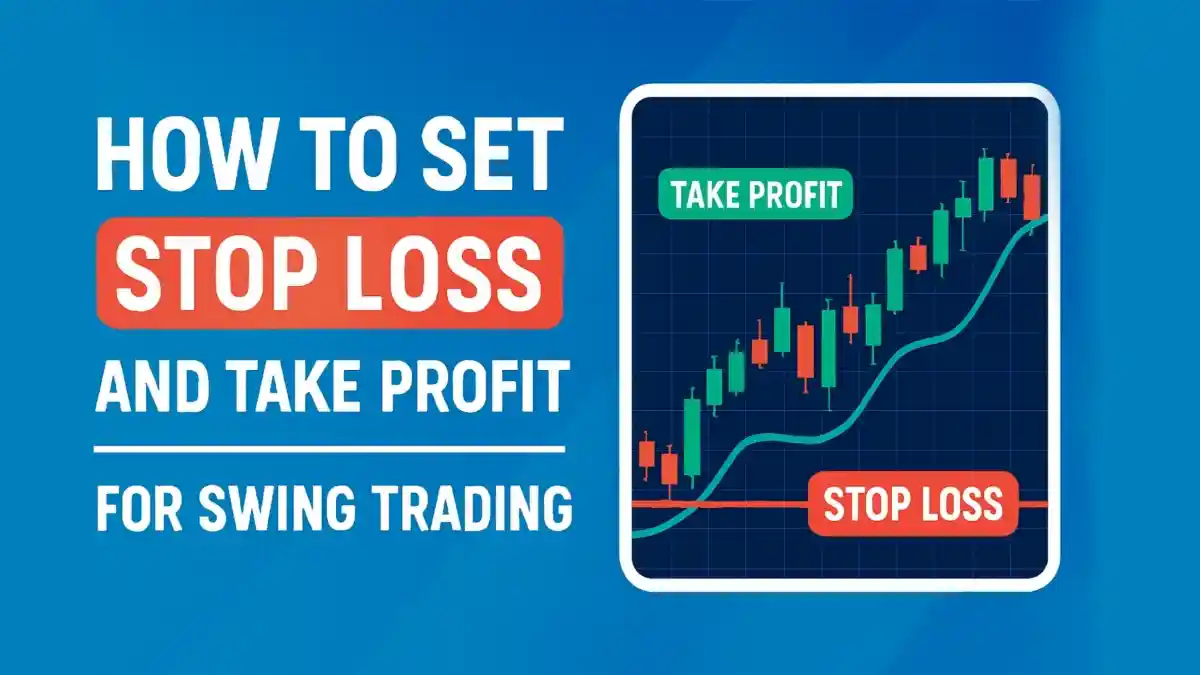
- 1. Understanding stop loss and take profit
- 2. Why these levels matter in swing trading
- 3. Core principles for setting stop loss
- 4. Core principles for setting take profit
- 5. Practical methods for stops and targets
- 6. Position sizing that matches your stop
- 7. Examples for common swing scenarios
- 8. Using trailing stops to protect and grow gains
- 9. Common mistakes to avoid
- 10. A simple repeatable workflow
- 11. Psychology and discipline
- 12. Advanced refinements
- 13. Putting it all together
- 14. Conclusion
Swing trading aims to capture medium-term price moves that play out over several days or weeks. It sits between day trading and long-term investing, giving traders time to plan while still targeting meaningful gains. To do it well, you need more than a strong entry. You need to protect your capital when trades go wrong and secure profits when trades go right. That is where stop loss and take profit levels come in. They add structure, reduce stress, and keep your decisions consistent.
This guide explains what stop loss and take profit levels are, why they matter, and how to set them for different market conditions. It builds a simple, repeatable framework you can apply to your swing trades without relying on complex jargon.
Understanding stop loss and take profit
What is a stop loss
A stop loss is a price level where you accept a small loss to avoid a bigger one. It tells your platform to exit the trade if the market moves against you beyond a point that breaks your idea for the trade. That prevents a single mistake or surprise event from causing serious damage to your account.
What is take profit
A take profit is a price level where you close a winning trade and bank the gains. It helps you avoid holding out for “just a little more” and then watching the market reverse. By choosing a target in advance, you turn hope into a plan.
Why these levels matter in swing trading
Swing trades are exposed to overnight gaps, news, and broader market moves. Without a plan, emotions creep in. Traders get scared of losing, greedy for more profit, or stuck in doubt. Stop loss and take profit levels reduce that noise. They set the boundaries of risk and reward before any pressure hits. Over time, this discipline is what keeps your equity curve steady and your mind clear.
Read also: What Is Leverage in Trading? Simple Guide for Beginners
Core principles for setting stop loss
Define risk per trade
Start with a firm cap on how much you can lose on any single trade. Many traders choose one to two percent of their account per trade. This keeps losing streaks survivable and allows your edge to play out across many trades.
Use technical levels
Place your stop loss where your trade thesis would be proven wrong. That often aligns with clear structures on the chart: a broken support, a failed trendline, a break past a recent swing low or high, or a decisive move through a widely watched moving average.
- Support and resistance: If you buy near support, a stop just below that zone makes sense. If support fails, your idea is invalid.
- Swing highs and lows: Put stops beyond recent turning points to avoid normal noise triggering exits too soon.
- Trendlines: Breaks of clean trendlines often signal a change in direction. Place stops beyond the break.
- Moving averages: In trends, key averages can act like dynamic levels. Stops can sit just beyond them.
Account for volatility
Markets do not move in straight lines. If your stop sits too close, minor wiggles may knock you out of good trades. Tools like Average True Range (ATR) help you measure typical movement. Using a distance based on ATR helps your stop respect normal swings while still protecting you from deeper failures.
Avoid emotional placement
Skipping stops, widening them out of hope, or tightening them out of fear breaks your plan. Keep stops rational, rule-based, and consistent with your strategy.

Core principles for setting take profit
Use a clear reward to risk ratio
Define the minimum reward you want relative to your risk. Many swing traders aim for at least two to one. If your stop is two percent away, target four percent or more. That math lets you be wrong often and still grow your account.
Anchor targets to the chart
Pick profit levels that align with structure and context. Common choices include the next clear resistance in an uptrend, the next support in a downtrend, measured moves from chart patterns, and well-tested levels that price reacts to often.
- Next resistance or support: Plan exits near zones where price has turned before.
- Range boundaries: If price trades in a range, aim for the opposite edge.
- Pattern objectives: Targets from flags, channels, or breakouts can guide exits.
- Fibonacci areas: Common retracement or extension zones can act as practical profit targets.
Match targets to market conditions
Strong trends can carry price far. In those phases, stretch your targets. In choppy markets, be more conservative. Your target should reflect the path price can realistically travel before running into resistance.
Consider partial profit taking
Sell part of your position at the first target and trail the rest. This locks in gains while giving the remainder room to capture a larger swing.
Practical methods for stops and targets
Percentage-based method
Set stops and targets by fixed percentages from entry. For example, a stop at three percent and a target at six percent. This is simple and fast, but it can ignore the chart context. Use it as a baseline, not a rule for every trade.
ATR-based method
Base your stop and target on current volatility. If ATR is two points, a stop might be at 1.5 times ATR and a target at three times ATR. This adapts to fast and slow markets and reduces premature exits in noisy conditions.
Support and resistance method
Identify the nearest invalidation level for your stop and the next major level for your target. This keeps your plan aligned with how price actually reacts around key zones.
Moving average method
In trends, use a widely followed moving average as a guide. Place stops just beyond it and set targets near the next structure level. This approach is popular for swing trades that ride the trend while respecting pullbacks.
Position sizing that matches your stop
Position size connects the chart to your account risk. If your account is 10,000 and you risk one percent per trade, you can lose at most 100 if the stop is hit. If your stop is two points away, buy enough shares so that two points equals 100. This keeps your risk per trade stable regardless of stop distance.
- Define risk: Choose the amount you can lose per trade in currency terms.
- Measure stop distance: Calculate the gap between entry and stop.
- Compute size: Position size equals risk divided by stop distance.
Examples for common swing scenarios
Buying a pullback in an uptrend
Price pulls back to a prior support zone and shows signs of holding. You enter near support. Place your stop just below the support and set your first target near the next resistance. If momentum is strong, trail the remainder under higher swing lows to protect gains.

Shorting a rally in a downtrend
Price rallies into a clear resistance area within a downtrend. You enter short near resistance. Your stop sits just above that zone. Target the next support below, and trail the remainder above lower swing highs as price falls.
Trading a breakout from a range
Price builds a tight range and then breaks out with volume. Enter on the retest. Place your stop just inside the range to limit risk if the breakout fails. Target a measured move equal to the height of the range. If the move extends cleanly, trail your stop under higher lows or above lower highs.
Using trailing stops to protect and grow gains
A trailing stop shifts as price moves in your favor. It can be fixed, like moving the stop by a set distance, or dynamic, like following swing lows, channels, or an average. Trailing stops let winners breathe while pulling your risk line forward as the trend develops.
- Swing-based trail: Move the stop below each new higher low in an uptrend or above each new lower high in a downtrend.
- Indicator-based trail: Follow a moving average or volatility band with the stop just beyond it.
- Step-up trail: Every time price clears a key level and holds, ratchet the stop to lock in a new floor.
Read more: How to Start Day Trading for Beginners: A Complete Guide
Common mistakes to avoid
- Stops placed too tight: Normal noise knocks you out, and you miss the planned move.
- Ignoring account risk: Oversized positions turn small errors into big losses.
- Targets set too far: Unrealistic goals reduce your hit rate and increase frustration.
- Moving stops out of hope: Widening stops after entry often turns small losses into large ones.
- Not adapting to conditions: Using the same stop and target rules in all markets weakens results.
A simple repeatable workflow
- Define the setup: Trend, level, and trigger that support your trade idea.
- Pick invalidation: The price level that proves you wrong becomes your stop.
- Set targets: Use the next structure level and a reward to risk of at least two to one.
- Size the position: Match your account risk to the stop distance.
- Manage the trade: Consider partial profits and a trailing stop as price moves.
- Review and log: Record what worked and what did not to refine your method.
Psychology and discipline
Good analysis is not enough. The best swing traders keep emotions in check with simple rules they follow trade after trade. Stop loss and take profit levels help you avoid chasing price, second-guessing exits, or holding losers. Over a large sample of trades, discipline outweighs any single result.
Advanced refinements
Multiple targets with scaling out
Plan a first target at a nearby structure level and a second target where the bigger swing likely ends. Close a portion at the first and trail the rest. This smooths equity growth and reduces the pressure of trying to time the exact top or bottom.
Combining signals for higher confidence
Use confluence. When support aligns with a trendline and a moving average, the level often carries more weight. Stops and targets set around confluence zones tend to be more reliable than levels chosen in isolation.
Time-based exits
Some swing trades lose steam after a set number of days. If price has not reached your target by then and momentum fades, tighten your stop or take profits. This avoids holding dead positions that tie up capital.
Putting it all together
Successful swing trading blends clear entries with thoughtful exits. Your stop loss sits where your idea breaks. Your take profit aims for realistic reward that fits the chart and the trend. Your position size ties those levels to the risk you can afford. Repeat this plan and refine it with notes and data from your own trades.
Do not aim for perfection. Aim for consistency. With a steady process for stops and targets, you will cut losses early, let winners work, and keep your account healthy through changing markets.

Conclusion
Stop loss and take profit levels turn swing trading from impulse into strategy. They define risk, set goals, and protect progress. Use structure on the chart, respect volatility, and match your position size to your plan. Over time, this approach builds confidence and results. Keep it simple, stay patient, and let your rules do the heavy lifting.